
 | Editing Channel Groups |
| Prev | Using NeuroScope | Next |
The first task you will want to perform upon starting NeuroScope is to group related channels. Usually, this is first done in the Anatomical Groups Palette, because this determines how the channels are displayed. Indeed, in the display channels are layed out in the same order as they appear in the Anatomical Groups Palette: the first channel of the first group appears at the top, the second channel of the first group appears right below, etc. until the last channel of the last group which appears at the bottom of the display. Also, groups are separated by small gaps so they are more readily visible.
Initially, all channels belong to the same group. In order to create a new group, you must first select the channels you want to group by clicking on the corresponding colored circles in the palette. Use Shift or Ctrl for multiple selections (see the menu for more choices). Then, group these channels by selecting -> or by clicking on
 .
.
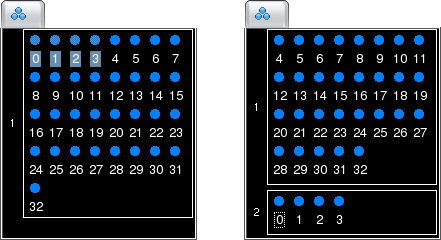
On the display, groups are spatially separated by small gaps to make them more readily visible.
You may want to discard floating or noisy channels altogether. This can be done by selecting the channels and selecting -> or by clicking on
 . The channels will be moved to the Discarded Group, as indicated by the small trash icon next to the group box in the palette.
Notice that discarding channels does not modify your data in any way: it does not actually remove the channels from the data files, but merely hides them from the display. Discarded channels can be brought back by moving them to an existing group (this is explained in Moving Channels between Groups).
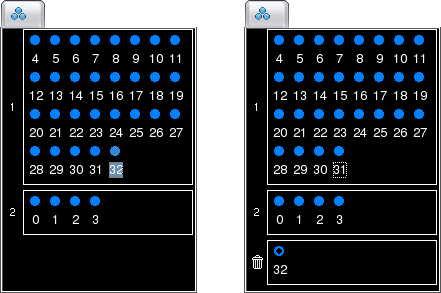
You may have noticed in the above screenshot that the circle for the channel in the Discarded Group is now hollow. This is a visual hint to indicate that this channel is now hidden from the display (for more information on hidden channels, see Showing and Hiding Channels).
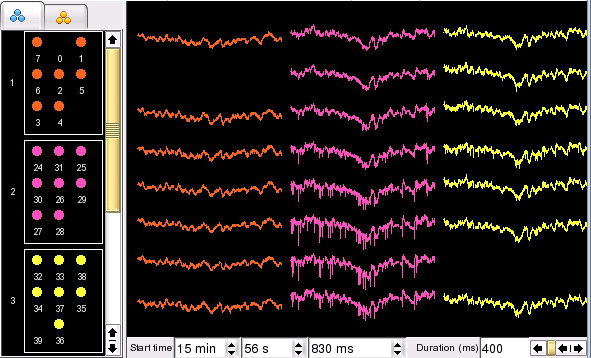
If you are viewing data recorded from silicon probes and one or more channels are unusable (e.g. floating or extremely noisy), you may want to discard those channels using the method described in the previous section. However, this would not be appropriate here because valuable spatial information would be lost: due to dynamical rearrangement of the display, the layout of the traces would no longer reflect the spatial arrangement of the recording sites on the probes. The solution is instead to have NeuroScope 'skip' the unusable channels by selecting the channels and choosing -> or by clicking on
 . The traces will be hidden and replaced with a small gap, thus ensuring that the overall layout of the channels remains unchanged in the displays. The corresponding circles in the palettes will also be hidden (leaving only the channel numbers).
You can bring back skipped channels by selecting the channels and choosing -> or by clicking on
 . The channels will be reappear in the displays and the palettes.
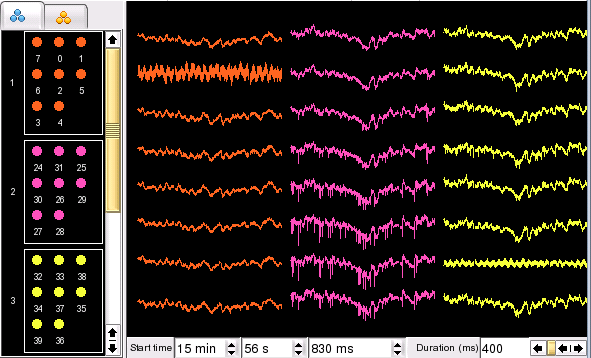
Channels can be moved from one group to another group by simply dragging and dropping the corresponding circles in the palette. This includes moving channels to and from the Discarded Group.
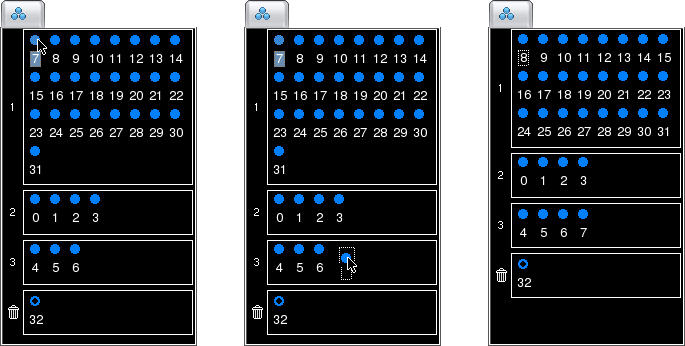
Note that the channels cannot be dropped on top of another channel (if you attempt this, the pointer will turn into a "forbidden" cursor and the operation will be cancelled). Instead, they must be dropped on an empty space.
Channels can be easily reordered within a group by dragging and dropping the corresponding circles in the group box, similar to moving channels between groups except that the displacement occurs within a single group.
Groups can also be reordered using a drag and drop approach. To select a group, click on its ID (the number on the left side of the group box). You can then drag it and drop it just above or below the ID of another group to move it there.
As mentioned earlier, the typical way to organize channels is to first work with anatomical groups. In many cases, spike groups are mostly identical to anatomical groups: anatomical groups could thus be used as a basis to define spike groups. In such cases, NeuroScope can reuse the groups in the Anatomical Groups Palette to define spike groups: select ->. Since this will override any existing spike groups, you will be prompted for confirmation if you have already defined spike groups.
While all the above mentioned operations apply to both anatomical and spike groups, this feature is only relevant for spike groups. It provides a way to deal with those channels that did not record any unit activity, although they did record valuable local field potential information. Obviously, these channels should not be discarded. However, they should not be used for spike extraction and sorting, either. In order to indicate that these channels do not belong to any spike group, select them and choose -> or click on
 . The channels will be moved to the Undefined Spike Group, indentified by the question mark. Notice that this is the same group where all channels are initially listed before you start defining spike groups.
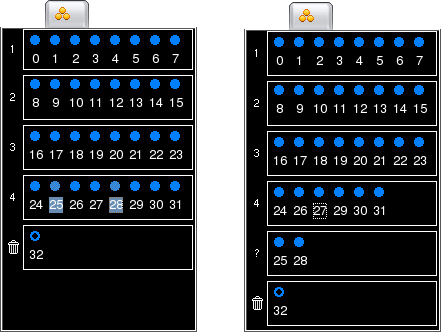
Notice that removing channels from a spike group does not modify your data in any way: it does not actually remove the channels from the data files, but removes their IDs from the list of spike groups used for subsequent spike extraction and sorting. Removed channels can be brought back by moving them to an existing spike group (this is explained in Moving Channels between Groups).
| Prev | Home | Next |
| Palettes | Up | Managing the Display |